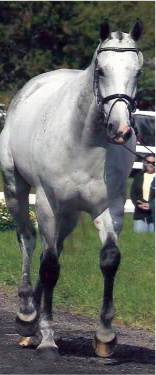
 Do you ever stare in awe at the sleek shiny horses, the glistening brass, perfect braids, and dazzling white marks at a CCI trot up? Do you ever wonder how they get that way? (LOTS of hard work is the correct answer!) Each Sunday morning we will bring you a little insider info on how the big-time grooms manage an upper level event horse. Feel free to email or comment with specific grooming questions if you have a topic in mind!
How to Wrap a Foot

Anyone who has ever dealt with an abscess also knows the value of a good foot wrap. There’s no real “wrong” way to do it, but with experience and practice you will learn techniques to create the most durable, effective wrap. I learned from a farrier, on a retired upper level horse who required hind foot wraps daily, or semi-daily, for three months. Did I mention he was also a tasmanian-devil stallwalker? If you didn’t wrap it right, he would destroy it in a couple hours. You learned pretty quickly what worked and what didn’t!
MATERIALS:
-Padding. This can be thick bandaging cotton, or disposable diapers (my favorite). Be sure you are using appropriately-sized diapers… newborn size is tiny, but there is such a thing as too big!
-Vetrap. For horses living outside, I like to use a full roll. If the horse is “gentle” on his feet, in a stall, you could get by with just half a roll per foot.
-Duct tape.
-Medication (optional). I like to use Magic Cushion to help reduce inflammation and relieve bruising. It’s helpful for a variety of foot maladies, and always good to have around! Use rubber gloves to apply, as it is EXTREMELY sticky.
-Rasp (optional). A shoe-less hoof often has sharp edges or chips in the wall; this can crack or chip farther. But rounding the edges lightly with a rasp can help prevent excess damage, and also keep a sharp wall from cutting through your padding.
PROCEDURE:
Clean the foot and check for any irregularities (cut heels, sole punctures, etc). If desired, lightly rasp the edges of the hoof wall. Apply medication as desired.
Hopefully you have set out all your materials within easy reach. And tied up the horse’s tail, if you’re working on a hind foot. Wrap padding across the sole; if using a diaper, pull it snug and fasten it in front on the coronary band. If using plain cotton bandage, smooth it out and tuck the corners in well.
Begin the vetrap near the coronary band, going vertically down the toe and across the sole towards the heels. Turn the vetrap sideways, go across a heel, and “grab” the tail end of vetrap near the coronary band. Continue across the other heel, diagonally down towards the toe. Continue in this diagonal figure-8 pattern, until the whole sole is covered. If the horse is tough on his wraps, or will be living outside, I use the entire roll of vetrap. A horse living in a deeply-bedded stall (and/or very lame from an abscess) can probably get by with only half a roll.
Top off your vetrap with three or four layers of duct tape strips. Alternate horizontal and vertical patterns for strength. You can lay each strip individually on the foot, or create a “patch” by sticking the tape to something else (like the leg of your jeans), building your layers, and then sticking it to the sole. For an antsy horse, it’s handy to make up the patch beforehand, so you don’t have to hold the foot up as long.
The finished wrap should be very snug around the hoof horn, but still have some flexibility around the pastern (fit a finger beneath).


