

 Do you ever stare in awe at the sleek shiny horses, the glistening brass, perfect braids, and dazzling white marks at a CCI trot up? Do you ever wonder how they get that way? (LOTS of hard work is the correct answer!) Each Sunday morning we will bring you a little insider info on how the big-time grooms manage an upper level event horse. Feel free to email or comment with specific grooming questions if you have a topic in mind!
Previous entries: All Wrapped Up: Stable Bandages
Breastplates, Breastcollars, and Breastgirths
To see all previous entries, click on the “Sunday Jog-Up” category in the sidebar to the right.
All Wrapped Up: Polos

Polo wraps are your favorite fleecy friends used for leg protection during exercise when you forget your half chaps. Also great for your horse, too! Seriously though, polos are a suitable alternative to galloping boots when the need arises. Generally I MUCH prefer a good set of Woof (or other brand, such as Nunn Finer) boots instead of wraps: faster to apply/remove, easier to clean– just hose off–, and safe in most weather conditions. As we all should know, polos are completely unacceptable for cross-country…they slip horribly when wet, causing disastrous results as they come unwound on a galloping horse. Why, then, would you waste your time rolling all those polos, and spending hours untangling them from the dryer?
Polo wraps are perfect for sensitive-skinned animals. They rarely rub, and are perfect to use after your horse has had its legs shaved (either body clipping white socks, or shaving for a tendon ultrasound). I’ve learned the hard way…do NOT use a boot on a shaved leg, the friction will irritate the skin into blowing up huge! Polos only, please.
I also have an “off-label” use for polos: instead of standing wraps for turnout. Horses who live outside 24/7 occasionally have need for a standing bandage (a cut that needs sweating, for example) yet full-on standing wraps would be unsuitable. Thick and bulky, standing wraps tend to soak up dew from the grass, and shift too easily on an outdoor horse, so I do NOT use them in turnout! If I must wrap a leg, I’ll use a polo wrap instead. In such case, I’m careful to end the wrap higher on the ankle, to stay up out of the mud and wet grass, less likely to slip. The wrap should be changed twice daily, and if there is much risk of it coming undone (rain! or anything but a quiet horse) do not use this method on unsupervised animals.
Because of the possibility of slipping down, use polos with caution: preferably for flatwork only. If you do use them for jumping or fast work, be extra sure they are wrapped securely and keep an eye out for any loosening or displacement. Don’t use them in muddy or wet environments– that’s just asking for trouble!
How to Apply Polo Wraps:
Some methods (including the Pony Club Way…even though PC believes polos are the devil) call for unraveling the first 6″ of material to use as a “protective strip” placed vertically down the tendons. I generally don’t see the need for this…it takes a little extra time, and honestly a thin extra layer of fleece isn’t likely to provide much extra protection to the tendons anyway.
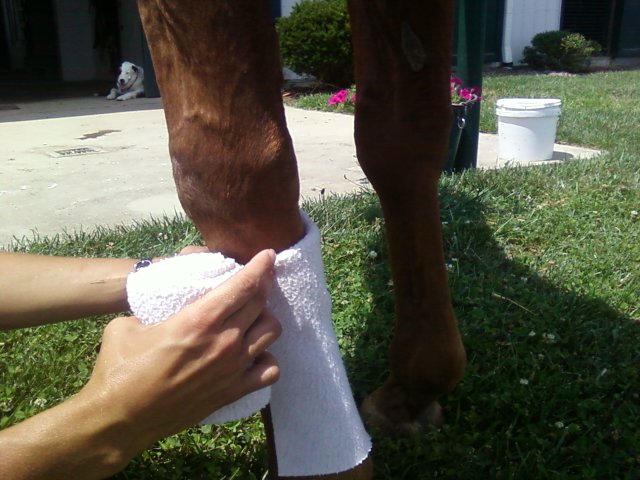
I start my polos just like any other wrap: place the edge of the tail-end along the inside of the leg, about 2/3 up the cannon. Wrap from front to back, inside to outside, maintaining consistent tension. Since there is no extra padding to disperse pressure, use extreme care not to wrap too tightly! Wrap down the leg, overlapping with even spacing. Go under the fetlock to “cup” it, making a nice V at the front to allow for flexion. Continue back up the leg, even spacing, until you end just below the knee or hock. Ideally, the velcro will fasten on the outside of the limb, to reduce the risk of the horse brushing it and loosening.
The finished wrap should be neat and trim, following the contours of the leg nicely. The polo should not be “tight,” as it does not provide support. The wrap should just be snug enough to maintain its position.
A “protective strip” down the back of the tendons.

Continuing the wrap down the “strip.”

Starting the wrap normally, from the inside of the cannon bone.

Continuing down the leg, making even overlaps with consistent tension.

The finished product. Velcro ending on the outside of the leg.

Beginning the wrap on a hind leg: starting lower, about halfway down the cannon.

A finished hind wrap. Note the centered “V” at the fetlock.
Hints for pretty polos:
-As with stable bandages, roll your polo wraps tightly! I prefer to roll them on my knee, pulling some of the stretch to make it very snug as I wind up the bandage. Your rolled polos should be very firm– not loose– when you’re finished. Tuck the corners under, throw the polo at a barnmate and she should respond with “Ow!!” Otherwise, it isn’t rolled tight enough (or you need to work on your aim. Yes, long hours in the barn will make you seek strange entertainment at times, like pelting people with polos. It is fun though.)
–New polo bandages are always awkward to use. Thick and fluffy, they often look very bulky on the leg. The new fleece is also “slick,” and tends to slip. Wash your polos as often as you can to “break them in.”
–Older polos are the bomb. A bit nappy, with some “pilling” on the fabric makes them grip better, becoming less likely to slip or shift. Take care of the velcro, and your polos will easily last for years.
-Speaking of velcro: it accumulates lint when you wash them. Pick out as much as you can from the “hook” side, or else you run the risk of un-sticky velcro coming undone while you ride. If the velcro loses its adhesion, don’t use the wrap anymore!
-Select one or two colors and stick with it. I know it’s fun to “accessorize,” but there is really no need to have a set of polos in fifty different colors. They only get lost (one at a time), and you’ll end up with mis-matched legwear. Stick with white, black, navy (etc) so that as singles disappear over time, you can still have plenty that match. Conservative colors also look good on a variety of horses.
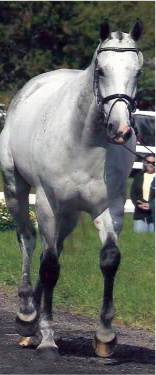
–Nothing dresses up a horse better than a set of white polos for flatwork. Something about the flashing optical illusion always makes a “decent” mover appear amazing. Unless you have an endless supply of white polos, save a set of four for special occasions when you want that little bit of “pop.” White polos tend to stain, and the dingy-ness is not appealing. Retire your old white polos to schooling use, and keep your others bright. White polos look a little silly on light gray horses– go for the contrast and use a dark color instead.


