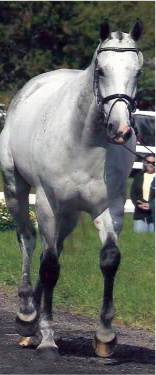
Do you ever stare in awe at the sleek shiny horses, the glistening brass, perfect braids, and dazzling white marks at a CCI trot up? Do you ever wonder how they get that way? (LOTS of hard work is the correct answer!) Each Sunday morning we will bring you a little insider info on how the big-time grooms manage an upper level event horse. Feel free to email or comment with specific grooming questions if you have a topic in mind!
Previous entries: Shank You Very Much
What About Tack? Part I , Part II
Phase 1: Mane Event
This week marks the start of a month-long project in which I will turn an average, “backyard” horse into a creature of beauty. Or at least, that’s the plan. I considered using a horse that already looks good, but where’s the fun in that? I think it’s a better learning experience to start with an “ugly duckling” and turn him into a lovely swan. I’ve broken the transformation down into four phases, with a new procedure presented each week.
Phase 1: Mane
Phase 2: Tail
Phase 3: Braids
Phase 4: Finishing touches, including quarter marks.
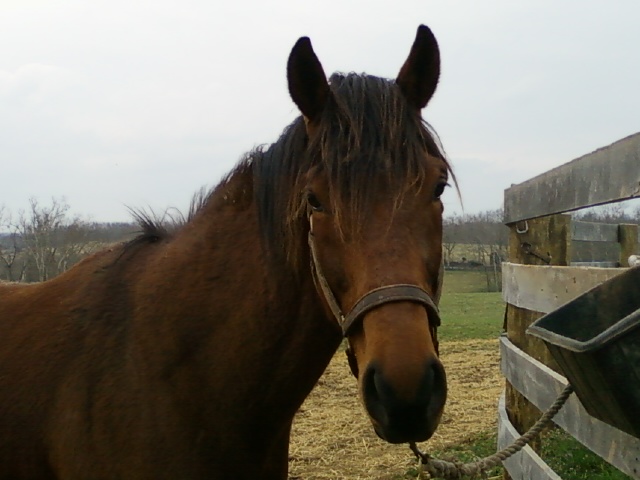
My innocent victim eager test subject is “Benny,” a six-year-old OTTB. Benny sustained a suspensory injury last spring, retired from the track, and hasn’t done much in the last year except sit in a field and beat up on his pasture mates. He’s lives out 24/7, is healthy and well-fed, but hasn’t seen a brush or comb in quite some time. Fairy groom-mother better get to work with pixie dust and magic wand!

PHASE 1: MANE EVENT
We begin the journey with a very thorough grooming. It’s springtime, the birds are chirping, the grass is growing, and the horses are rolling in mud and shedding like crazy. I curried for half an hour, and Benny lost enough hair to resemble a small dead goat on the floor. Somewhere, though, a bit of shine lies deep in the fluff. I can’t see it yet, but I know it’s in there!
Ideally, Benny will get a good grooming (and hot-toweling) every day. Given his living arrangements, though, it will probably only happen two or three times a week. We’ll have to make do with what we can.
After covering myself with dust and hair, it was time to tackle 12″ of unruly mane. More than anything else, shortening a mane can make a HUGE immediate improvement in a horse’s appearance. From cart-horse to sport-horse in the pull of a comb. Some horses are not fond of the procedure, so be prepared: have a helper, a twitch on hand, and a chain shank if necessary. In extreme cases, sedation may be the best route; always consult your vet, and plan well in advance of any upcoming show.
Coming from a hunter barn, I learned to pull manes with the standard 4″ aluminum comb. Tease the hair, wrap it around the comb, and pull. It took a good bit of time, and it could be a little difficult getting the mane the length you wanted since you wrapped it around the comb. When I started working with Thoroughbreds, I was taught “pulling combs” were completely unnecessary. Any standard plastic mane comb will do. Wear latex gloves for grip, and it is a whole lot faster!
Begin by combing or brushing the whole mane, to remove any knots. Don’t be gentle– rip, tug, and tear at tangles, the more hair you get out now the better. I usually start pulling at the withers and work toward the head; typically most horses are worst-behaved when you get near the ears, so I save that for last. Starting near the withers, where the horse doesn’t mind, allows you to set a good, accurate length to guide you for the rest of the mane.
To pull: grasp a small section of mane, perhaps 0.5″ wide (depending on the mane’s thickness). Back-comb this section to near your desired length. Grasp the remaining hair firmly with your left (latex-gloved) hand; pull downwards sharply with both hands (including the comb). You don’t have to pull the WHOLE section out at once– you can pull downward only a few inches to rip about half of the hair, then tug again to remove the rest of it. If you end up pulling the horse’s whole neck on top of you, you took too much hair! Try a smaller section. VIDEO HERE.


Back-comb or “tease” to the desired length… Grasp mane firmly with left hand… Pull down sharply.
When you’ve finished the whole neck, go back with your bare (or gloved) hands and neaten up any irregular areas. Comb the mane down, run your fingers through it often to check its density. You’ll notice an occasional long wisp, or thick spot, just grab those few stray hairs between your fingers and rip them out firmly.


Halfway done! Neatening up, pulling individual wisps without the comb
Take your time! Most horses will object to ripping huge chunks out all at once; go slowly and they might learn to stand for it. Generally, well-muscled necks tend to be the hardest to pull…a nice topline seems to have roots of iron and refuses to give up the flowing locks. Babies and flabby broodmares, however, give up mane by the handful. For very thick manes (draft crosses), you may need to pull a little bit every week, to get it thin enough for nice braids. It is possible to “cheat” to some extent: some people half-roach the underside of the mane on extremely wide crests. When pulling becomes impossible…a full roached mane looks just great!
Tricks of the trade:
-Most of the “work” is done by your left hand, and you may develop blisters or cuts on your fingers after some really tough necks. Bandaids, or duct-tape “rings” around your knuckles beneath the latex glove help a lot.
–The goal of pulling isn’t *just* to shorten the mane— heck, scissors can do that a lot faster! It is to produce a “natural” effect, of even length and desirable thickness throughout. Your braids generally reflect the quality of the mane; an uneven mane makes for inconsistent-sized ugly braids. Put in the effort with the pulling comb and you will thank yourself later. A short, thin mane is much faster to braid than a long, thick one!
–Speaking of scissors: just say no. Most cutting tools cannot reproduce the quality of a pulled mane. It may LOOK sufficient, but when you go to braid it you will notice the difference. “Manufactured manes” are often too thick, and areas where the hair has been cut will regrow with wild abandon, creating determined little stick-up pieces among your braids.
-That doesn’t mean I do it all by hand. “Pulling” will always THIN a mane. But what about a mane that is too thin? Places like the withers are almost always wispy (thanks to blanket rubs), and often thinner near the poll since the crest isn’t as wide. For those areas, or for thin manes in general, I use an old, dull clipper blade to shorten the hair. Angle the blade firmly into the hair at the desired length, and tease it back like you would with a pulling comb (about a half-inch above/below length). This will frizz and shorten the hair irregularly within that area, looking very much “pulled” without removing the roots. As with pulling, go slowly and work small sections at a time, to avoid a blunt cut.


“Blading” a thin section near the withers. The finished product! (nevermind the battle scars)


For reference, here is a “before” pic of Benny:
And this is after week 1:
And he hasn’t even had a bath yet!
If you notice, I actually completed Phase 1 (mane) and Phase 2 (tail) for this photo. We will explore Phase 2: The Taming of the Tail in depth next week. See you Sunday!