Do you ever stare in awe at the sleek shiny horses, the glistening brass, perfect braids, and dazzling white marks at a CCI trot up? Do you ever wonder how they get that way? (LOTS of hard work is the correct answer!) Each Sunday morning we will bring you a little insider info on how the big-time grooms manage an upper level event horse. Feel free to email or comment with specific grooming questions if you have a topic in mind!
Previous entries: Extreme Makeover: Taming the Tail
What About Tack? Part I , Part II
Phase 3: Button Braids

This is Week 3 of a month-long project in which I will turn an average, “backyard” horse into a creature of beauty. Or at least, that’s the plan. I considered using a horse that already looks good, but where’s the fun in that? I think it’s a better learning experience to start with an “ugly duckling” and turn him into a lovely swan. I’ve broken the transformation down into four phases, with a new procedure presented each week.
Phase 1: Mane
Phase 2: Tail
Phase 3: Braids
Phase 4: Finishing touches, including quarter marks.
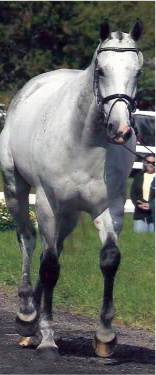
My innocent victim eager test subject is “Benny,” a six-year-old OTTB. Benny sustained a suspensory injury last spring, retired from the track, and hasn’t done much in the last year except sit in a field and beat up his pasture mates. He’s lives out 24/7, is healthy and well-fed, but hasn’t seen a brush or comb until recently. The change is dramatic!


PHASE 3: BUTTON BRAIDS
NOTE: due to technical difficulties, this topic will be split into two segments. Part II will be presented on Wednesday.
What defines an eventer’s turnout? Some people would say tails — properly pulled and banged. Most, though, would point to a beautiful braid job. Tails are somewhat limited to environment and genetics to be successful. But braiding is all about effort and skill, qualities that displayed by any good groom. I love braiding; yes, it is tedious, but the results are so worth it!
The classic eventer’s braids are sewn-in with needle and thread, known as “buttons” or simply “sew-ins”. Of course, anything that makes the horse presentable is allowed: yarn braids (“hunter” style), roached manes, and rubberband braids (another pet peeve of mine). I learned to braid with yarn, and it is a quick, easy method to show off the horse’s neck. But the results are largely dependent on the quality of the horse’s mane: thick, uneven manes tend to make ugly braids. And if the horse rubs? Forget it, the braids fray, fuzz, and go crooked. And shavings in the braids are the kiss of death!
I was grooming at a major three-day when a seasoned, big-time groom kindly took me into the world of Real Braiding. The needle and thread looked like a ton of work, but the results were fabulous: like the mane was roached clean, and little tiny button balls glued in place. Not a stray hair to be seen. I was hooked…I wanted MY horse’s crest to look like that!
It takes a bit of practice to master the technique, but once you get it you’ll never go back. Button braids not only look fantastic, they are extremely durable. I’ve YET to have a horse rub one out, after 8+ years. No overnight Sleezy required– just brush shavings out, the braid won’t be disturbed. You can make ugly, uneven manes look acceptable; slightly too-long or too-short, you can make it work. If you have enough thread and enough patience, almost any mane can look really, really good.
MATERIALS

- Needle: preferably a “carpet” needle, with dull tip (no bloody fingers) and large eye for easy threading. Look in the crafts department of any value store.
- Thread: waxed thread. Buy the big roll from Bit of Britain, Harmony (the big blue trailer), or Somerset Saddlery. Other places carry it too, those are just common at horse shows when you run out. Yeah, it’s about $30, but it lasts up to 20+ braidings, and it’s good stuff.
- Waxed thread is AWESOME. It locks braids tight and has good “grip” on loose hairs. Black looks good on just about any horse; it’s hardly noticeable on chestnuts, and I’ve used it on pure white manes, too
- Scissors: buy the really sharp, pointy ones in the crafts department. Makes taking braids out much easier; just be careful not to cut yourself (I give this warning to anyone who borrows my scissors, and they still bring them back complaining about blood).
- Hair clips: I prefer the long-beaked clips, colored plastic ones are easy to find when you drop them.
- Spray bottle: I’m a believer in QuicBraid, but plain water also works too.
Use anything handy for a stool…an overturned bucket works fine. Or, you can keep all your braiding supplies in a handy stepstool box. I keep my essentials in a super snazzy fanny pack; it looks incredibly ridiculous, but who am I to care at 5am.
TECHNIQUE
The key to good braiding is consistency: trying to make each braid identical. Of course this is impossible, but try to keep them as even as possible in width and thickness (this is why mane pulling is so important!). You’ll have to compromise sometimes, taking a larger chunk here, smaller chunk there, to even out odd spots within the mane. With button braids, you can cheat a little bit and leave the tied-up braid looser or tighter to slightly adjust its size to match the rest of them.
Your sections of mane can vary in width to suit your needs: a delicate neck, with thin mane, looks best with more, smaller braids. A thick, heavy-set horse usually looks better with fewer, chunky braids. It also depends on how much time you have and what you’re competing… at an FEI jog, I go all out and put 20+ little perfect braids (and take up to an hour). At a lower-level horse trial with an 8am ride, I throw in 13 or 14 bigger blobs that I can finish in 25 minutes.
A good, all-purpose section-width to start at is three fingers (will get about 15-16 braids on an average neck). “Deluxe” braids are reduced to two-fingers width; that’s what gets you 20+ and takes quite a while. Whatever width you choose, make sure your sections are divided cleanly: you should see a clear, straight line defining the edges of each braid. (And this should be free of dandruff– wash those manes! Whoever perpetuated the myth that a dirty mane is easy to braid…get yourself some QuicBraid and clean your horse up!)
PROCEDURE
This is incredibly difficult to describe in words, so I created a video to help me explain. I’ll give you a little preview first, though:
Start by pulling about an arms-length of thread; this will do about three or four braids. I find it tedious to keep re-threading the needle after each braid, so I use a big piece to start with. Thread the needle– pinch (bite) the end of the waxed thread to flatten it if it won’t fit through the eye. Pull about 3″ or 4″ through the needle. Hold needle with teeth.
Use the hair clip to separate your 2- or 3-fingers of hair. Spray section with liquid, and begin braiding down very tightly. When you reach the end of the braid (it doesn’t have to be the VERY end, about half-inch will do), insert the needle through the last cross of the braid. Pull the thread all the way through (this can take effort if you have 2 feet of thread to begin with!), except leaving a little “tail” about half-inch long (or length of your leftover unbraided hair).
Fold the “tail” of thread down so that it becomes “leftover hair.” Fold leftover hair under to create a little bobbed end. “Hog-tie” this bobbed end (I obviously watch too much rodeo and calf roping) by wrapping it twice with thread, and spear it with the needle anywhere near the wraps– above, below, through, it doesn’t matter. Pull thread all the way through again, tightly. Your braid is now secure!
“Pull up” the braid similar to a yarn braid; run the needle up through the base of the braid, close to the crest. Pull through so that the braid is doubled. Insert the needle back down through the braid, from crest to doubled-end, keeping it centered. (This part reminds me of a shish-kabab). Pull through under the base again; when it doubles now, it begins to take on the “button” or ball shape.
Now, how to get the crest of the neck to look so tight and clean? “Bring in the sides” of the braid, by looping thread around each side and coming up through the base. Pull the thread tight! Take advantage of the grippy wax by grabbing loose hairs within your noose. Keep wrapping, left side and right side, until you’re happy with the appearance.
If your horse doesn’t rub, or if your braids won’t be in long (a jog, for example), you can simply cut the thread near the braid: no knotting is required. (See, doncha love waxed thread!) If you have a known braid-killer, or leaving them in overnight, finish off the braid with a half-hitch (like beginning to tie your shoes). I’ll give it an extra twist, too, for even more security. Doing this, I have NEVER had a braid come out unintentionally, despite rubbing or brushing.
My braiding procedure is detailed in the video below:
There are many ways to attain perfect button braids; each groom develops his/her own style, and little tricks to finishing off a braid (please share in comment section!). It takes a lot of practice and patience to master the technique, but the effort is far worth it.
REMOVING THE BRAIDS
(video coming Wednesday)
Wet the mane first! (Just Say No to curly manes!) Use your super-sharp scissors to cut each side of the braid’s thread. Then pull the braid down (you may have an underneath-cut to make, depending on how “aggressive” you were with thread). Given that no knots were made in the “hog-tie,” you can grasp the folded unbraided tail of hair, pull down, and the “hog-tie” will pop right off. Unwind the braid, comb it out, and done.
I know some people like seam rippers– and they are great for yarn braids. But waxed thread is tough, and I end up cutting myself, cutting mane, or breaking the stupid blade of the ripper. That’s why I have a pair of braiding-only scissors which I will defend viciously!
Wednesday I will also cover a few additional tips, like how to tame the frizzy withers or Mowhawk War Bridle Path, and more detail on forelocks. I’ll also attempt to answer any questions you may have in the Sunday comment section.
Good luck, and go braiding!