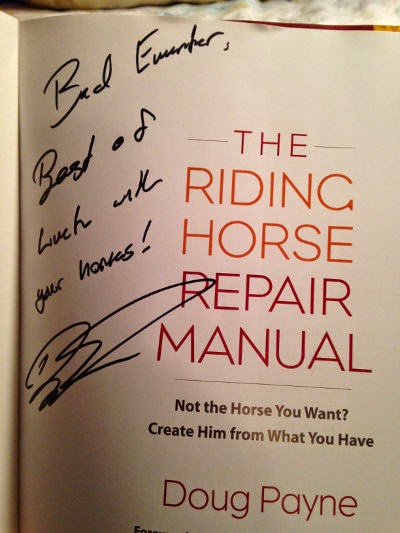
EN’s blogger friend Bad Eventer is still glowing from the Doug Payne clinic she rode in a couple weekends ago at Meadowcreek Park in Kosse, Texas. She chronicled the experience in her infamous blog, Bad Eventer, and kindly offered to share it with EN. Included below are excerpts from the dressage and show jumping days, edited down slightly on account of Bad Eventer’s tendency to go on wildly-entertaining tangents. For the complete report visit her blog — here are the links: intro, dressage, show jumping, cross-country.

Day 1: DRESSAGE
As I watched the first few dressage lessons I immediately saw a common theme. Doug started right out with the basics.
1. Straightness
2. Forward
3. Steady connection

Doug gave everyone hands-on demos on how the contact should feel. Probably one of the most useful things a top instructor can do for us mere mortals. This gives you a real feel of how it SHOULD feel.
He gave a fantastic demo on why your horse needs to be straight. Here it is again in case you missed Part 1. Doug is showing why your horse needs to be straight before it can be forward. He explained if they are crooked and you send them forward they are in a perpetual state of “falling,” which is where the running off/heavy on the forehand/rushing problems tend to stem from.
Straightness was also one of the first things he addressed with each horse. Most of the horses turned out to be quite one-sided and many riders ended up having to use the same set of aids in both directions to obtain straightness. (Example: right leg and right rein to push the shoulders left and straighten the neck while going right as well as left.)
I was excited because the main thing that I wanted to work on in my dressage lesson was straightness! My guy is pretty fancy and has so many buttons that he tends to spin around like a top. He LOVES the old intermediate test where you do haunches-in and then shoulder -in down the long side. He tends to OFFER haunches and then shoulders on any straight line……. which leads to some very “creative” movements.
Doug immediately recognized that my fancy pony had “trained me not to ride him.”
He gave me an exercise which started out with a leg yield at the canter asking for counter bend, then trot and continue the leg yield.
Here is where I get to admit that…….. apparently…….. I’ve never understood what counter bend was……..
With a riding career of more than a few <cough> decades, I have found that roughly every three to four years I come to realize…….. that I still have NO IDEA what I’m doing.
Doug used a dressage whip to demonstrate bend and counter bend, and said to think about the head and tail staying in the same place and the rest of the body changing the bend between them.
That would be different than just bending the neck to the outside, because the horse can still keep the body bent the other way. Here’s my note!
Each lesson reinforced the theme of the day: straightness, forward and steady contact, with Doug hopping on several horses for a tuneup. The changes he made in the horses were amazing with the quality of their gaits immediately going up several notches. It was a fantastic example of how “when you ride them properly, they get more beautiful.”
Here’s my favorite quote of the day, “His head is bouncing around because his butt isn’t in gear. It’s like the speedometer in your car. If the needle is bouncing around you don’t fix it by moving the needle, you fix it by stepping on the accelerator.”
Day 2: SHOW JUMPING
On stadium jumping day the Prelim/Intermediate group turned out to be…….. well……..
the remedial class.
Somehow this didn’t really surprise me…….. and yes, Bad Eventer was one of the guilty parties.
I think the gutsier ammies can often be the least…….. prepared.
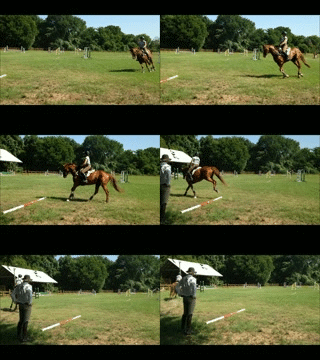
We spent the better part of our 90-minute session getting completely driven over by a handful of trot poles.
We started out with four poles in a circle. Two were set on a 20-meter circle and two on a 10-meter circle. The exercise was pretty simple: canter the 20 meter poles then spiral in over the 10-meter poles……..
It turned out to be harder than it sounds.
If you listen, you’ll hear Doug say, “It looks like it would be stupid easy…….. but……..”
While cantering the poles on the circle he also did a fun exercise where he stood in the middle of the circle and held up different numbers of fingers. The point was that once you “see it” there is no point in continuing to look at the pole you’re going over. Instead you can be looking to the next pole/jump, which will save time and help you set up for it quicker. Here he had the rider set themselves up for the pole and call out how many fingers he was holding up.
The next TROT POLE exercise…….. pretty much whooped all of us.
Another seemingly simple exercise. Canter over three poles that are 66′ feet apart, and put in five strides between the first two poles and six strides between the second two.
NOT SO MUCH.
Rider after rider just didn’t get it done.
I couldn’t believe how hard this turned out to be. One horse was sooooo NOT interested in changing his pace that Doug got on him to sort it out.
Once we all had FINALLY gotten the five- and then six-stride pole exercise, he raised the middle pole about 18″…….. and that proved to make the exercise once again…….. impossible.
Here’s Bad Eventer giving it a try!! or TWO!!
I think all of us walked away with several pages of homework. And while our group hardly jumped anything besides trot poles, it was a pretty big eye opener on what everyone needed to get a solid handle on!
The other groups nailed the trot poles earlier on and moved on to course work incorporating the same adjustability exercises……..
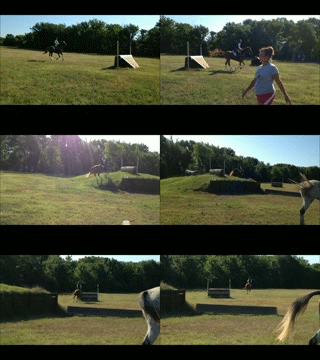
When we spent time tackling a five- to six-stride cross country combination the next day……..
……..the METHOD TO THE MADNESS BECAME CRYSTAL CLEAR!!
Doug definitely knows his stuff and I finished the day with a long list of…….. must master this next……..
Many thanks to Bad Eventer for sharing! Have a clinic report to contribute? Send it to [email protected].
Go Eventing!


